Creating your own dining table legs is a fantastic way to add a personal touch to your furniture while elevating the overall design of your dining space. Whether you're revamping an old table or building one from scratch, custom-made legs can transform an ordinary piece into a stunning focal point.
Yes, it can be quite a time-consuming endeavour, but if you’re committed and experienced, it can be a fun way to elevate and enhance your table. In this guide, we’ll outline how to make dining table legs at home in five (relatively) simple steps.
If DIY dining table legs seem like a bridge too far, you can save yourself the time and hassle by investing in the best quality dining table legs available. You’ll find an unbeatable selection of styles, lengths, and colours to choose from here at The Hairpin Leg Co.
Don’t worry - we put just as much care into crafting our table legs as you would do at home!
Benefits of Making Your Own Dining Table Legs DIY
Learning how to make dining table legs is quite the undertaking, so why do people still bother with DIY dining table legs? Let’s take a look at some of the advantages of making your own DIY wooden table legs or DIY metal table legs at home.
Design Freedom
One of the greatest advantages of making your own dining table legs is the freedom to design them exactly how you envision them. You’re not limited by the options available in stores; instead, you can choose the exact style, material, and dimensions that best suit your table and overall décor.
Whether you prefer a modern minimalist look or a more traditional, ornate design, the power to customise every detail is entirely in your hands. You can even learn how to make hairpin legs! This level of design freedom allows you to create a unique piece that reflects your taste and fits perfectly with your space.
Cost Savings
Building your own dining table legs can also be a more economical option compared to purchasing pre-made ones. The cost of materials like wood, metal, or other supplies is often lower than buying finished legs from a retailer.
Plus, by crafting the legs yourself, you avoid the markup that typically comes with store-bought furniture components. Even if you invest in quality tools for the project, these can be used for future DIY endeavours, making the initial expense more worthwhile.
Fun and Fulfillment
There’s a special satisfaction that comes from building something with your own hands, and crafting dining table legs is no exception. The process can be a fun and rewarding experience, giving you the chance to develop new skills and unleash your creativity.
You’ll likely find a sense of fulfilment in seeing your vision come to life and knowing that you played a direct role in creating your table. Plus, every time you sit down at your table, you’ll be reminded of your hard work and the personal touch you’ve added to your home. Can’t beat that!
How to Make Dining Table Legs: Simple 5-Step Guide to Crafting Your Own Furniture Legs
So, you’ve decided you want to tackle DIY dining table legs. Now what? In this simple 5-step guide, we’ll walk you through the process of making DIY metal dining table legs or DIY dining room table legs from wood.
Step 1: Choose the Right Materials
The first step in making DIY dining table legs is starting with the right materials. Most people find themselves choosing between wood and DIY metal dining table legs, which both bring their own pros and cons.
If you’re aiming for a warm, classic look, wood is an excellent choice. Hardwood species like oak, maple, or walnut are durable and can be finished in various stains or paints to match your decor. For a rustic or farmhouse style, reclaimed wood can add character and uniqueness to your table.
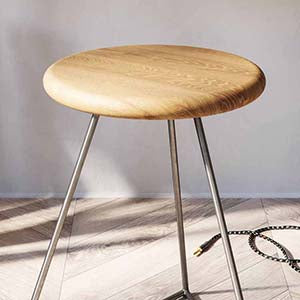
For a modern or industrial aesthetic, metal legs are a great option. What metal is used for table legs? Steel, iron, or aluminium can be used to create sleek, strong legs that provide a contemporary edge. Metal legs can be left in their raw state for an industrial look or painted for a cleaner finish.
Step 2: Measure and Design Your Legs
Before you start cutting or shaping, it’s crucial to have a clear design plan. Begin by measuring the height and width needed for your table legs. How long are dining table legs? Most dining tables have a height of 28 to 30 inches, so your legs should accommodate this while factoring in the thickness of the tabletop.
Sketch out your best table leg design, considering both the aesthetic and functional aspects of your DIY dining table legs. For wood legs, you might choose simple square or turned designs, while metal legs could be straight, tapered, or even feature geometric patterns.
The design is important for your table’s aesthetics, but it’s also essential to ensure your DIY dining room table legs are designed with enough support for the tabletop and can bear the weight of the items typically placed on your table.
Step 3: Cut and Shape the Legs
Once you have your design ready, it’s time to cut and shape the legs. Accuracy is key during this step to ensure all your legs are identical in size and shape, providing a stable base for your table.
For wooden legs, use a saw to cut the legs to the desired length. Depending on your design, you may need additional tools like a lathe for turning the legs into more intricate shapes or a planer to smooth the surfaces. Sand the legs thoroughly to remove any rough edges.
For metal legs, use a metal cutting saw or angle grinder to cut the pieces to size. If your design includes any bends or angles, you may need a metal bender. After cutting, file down any sharp edges and weld the pieces together if your design requires it.
Step 4: Apply the Finishing Touches
With the legs cut and shaped, it’s time to add the finishing touches. These finishing touches not only improve the appearance but also extend the durability of your DIY dining room table legs.
Stain or paint your wood legs according to your design. Staining enhances the natural beauty of the wood grain, while paint allows you to match or contrast the legs with the tabletop. After staining or painting, apply a protective finish like polyurethane to guard against wear and tear.
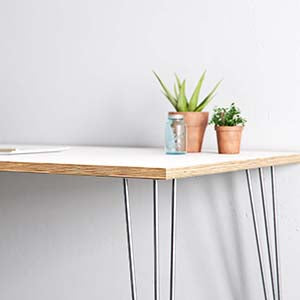
For DIY metal dining table legs, you can leave them raw for an industrial look or apply a coat of paint or powder coating to prevent rust and add colour. If you’ve welded any joints, ensure these are smooth and polished for a professional finish.
Step 5: Attach the Legs to the Tabletop
The final step in how to make dining table legs is actually attaching the legs to your table. Learning how to attach table legs depends on the material of both your legs and your tabletop.
If your legs are wooden, learn how to attach wooden table legs using strong wood screws or bolts to secure them to the tabletop. And if you’re wondering how to stabilise wooden table legs, adding corner braces or a table apron can provide additional stability.
For metal legs, the best way to connect table legs is to use metal brackets or flanges to attach them to the tabletop. In terms of how to stabilise metal table legs, make sure you use appropriate screws or bolts designed for metal to ensure a secure fit.
Is the DIY Dining Table Legs Project Right For You?
So, we’ve explained how to make dining table legs, but is this really the right DIY project for you? Before diving in, let’s explore the key factors that will help you decide if making your own dining table legs is something worth pouring your heart and soul into.
Time and Effort
Building your own dining table legs requires a big commitment of time and effort. Depending on the complexity of your design, the project can take anywhere from a few hours to several days to complete.
Think about your schedule and the amount of time you’re willing to dedicate to the project. If you’re looking for a quick weekend DIY, learning how to make dining table legs from scratch might not be the right project for you.
Skill Level
If you have experience with woodworking, metalworking, or general DIY projects, you’re likely well-equipped to tackle the task of making table legs. However, if you’re a beginner, this can be an intense project to kick off your DIY career with.
That said, this project can be a great learning experience for those looking to develop new skills. Start with a simpler design if you’re new to DIY projects, and don’t hesitate to seek out tutorials or ask for advice from more experienced DIYers.
Tools and Supplies Needed
Creating dining table legs requires specific tools and supplies, which can vary depending on whether you’re working with wood or metal. You’ll at minimum need a saw, sander, drill, and measuring tape. For more intricate designs, you may need a lathe, planer, or router.
If you’re working with metal table legs, essential tools include a metal cutting saw, angle grinder, and a welding kit if your design requires welding. You’ll also need metal screws, brackets, and paint or powder coating supplies for finishing. If you don’t already have these tools, it can be a significant cost.
Save Yourself the Time and Hassle and Ensure a Stunning End Result With Our Expertly Crafted Dining Table Legs!
Creating your own dining table legs requires time, tools, and a certain level of skill. If you’re short on any of these, buying pre-made legs can save you a lot of hassle. Luckily, you can find the best dining table legs here at The Hairpin Leg Co., ready and waiting for you!
Why You May Be Better Off Buying Professional Replacement Legs Instead
Professional replacement wooden table legs or the best metal table legs are designed by experienced crafters who ensure that the final product is both aesthetically pleasing and structurally sound.
By opting for pre-made legs, you avoid the risk of mistakes that can occur in a DIY project, such as uneven cuts or unstable designs, which could ultimately compromise the functionality and appearance of your table.
Plus, purchasing dining table legs allows you to select from a wide range of styles, materials, and finishes that may be difficult to replicate at home. This way, you can achieve a high-end look with minimal effort, giving you more time to enjoy your beautifully refreshed dining space.
What Makes The Hairpin Leg Co. the Premier Provider in the UK?
Here at The Hairpin Leg Co., we have the best selection of quality table legs you’ll find anywhere in the UK. With free shipping within the UK, 60-day returns, and a customer support team that wants to see you succeed, there’s no better place to buy your furniture legs.
Our table legs are expertly crafted by makers, who understand exactly what you need in a solid set of table legs. With a huge selection of beautiful designs to choose from, the biggest range of colours, and many different lengths and sizes available, you’ll find exactly what you need right here.
Browse Our Most Popular Styles Today and Give Your Table a Refresh!
From classic hairpin legs to modern bar table legs, we’ve got every style and design need covered. Whether you’re searching for elegant coffee table legs or durable outdoor table legs, our team can point you in the right direction for affordable, long-lasting, beautifully made table legs.
Bringing Our DIY Dining Room Table Legs Guide to a Close
Creating your own dining table legs can be a rewarding project, but it also requires a certain degree of know-how, a lot of time and effort, and a significant financial investment in both materials and tools.
If you’re looking for a simpler solution that still gives you elegant, boutique table legs, shop premium styles at The Hairpin Leg Co. Our table legs are made using the same care and quality materials you’d use at home, but they save you all the time and hassle of the DIY route.
Elevate your dining table today with stunning legs from The Hairpin Leg Co.!



Leave a comment
This site is protected by hCaptcha and the hCaptcha Privacy Policy and Terms of Service apply.