A fresh coat of paint could be just what you need to revitalise dated, weathered furniture legs. Or, maybe you’re buying new legs to install on your furniture and want to personalise them from the start.
Either way, this guide on painting furniture legs is going to leave you feeling confident and clear on your next steps, from choosing the right type of paint to application techniques, protective coatings, and more. From painting metal furniture legs to wooden furniture legs, we’ll cover everything you need to know.
But we won’t just teach you how to paint furniture legs to perfection - you’ll also find the perfect furniture legs to set out on the right foot with here at The Hairpin Leg Co.!
Our unfinished legs look exceptional as is, but they’re also a blank canvas that you can infuse with your own unique personality and flair. Discover the perfect style in our catalogue today!
Should You Consider Painting Furniture Legs?
There’s no question that painting furniture legs can be a great way to refresh and personalise your furniture, but it’s not always the best approach. Let’s look at the pros and cons below to help you determine your next steps.
Benefits of Painting Furniture Legs
Painting metal furniture legs or wooden furniture legs allows you to make them your own, letting your creativity ooze into your furniture.
Whether you choose a bold colour to make a statement or a subtle shade to complement your existing décor, painted legs can transform the look of a piece and make it uniquely yours.
This is also an easy way to tie your furniture into the overall design scheme of your room. You can create a cohesive atmosphere by matching or contrasting the leg colour with other elements in the space.
But one of the most common reasons we see people painting is to restore metal table legs. A fresh coat can breathe fresh life into scratched, chipped, or simply outdated legs. It’s more affordable than replacing the legs altogether.
Let’s face it - this is just a fun, fulfilling project too! There are so many reasons to learn how to paint furniture legs. But, you need to consider the other side of the coin as well…
The Appeal of Raw, Unfinished Furniture Legs
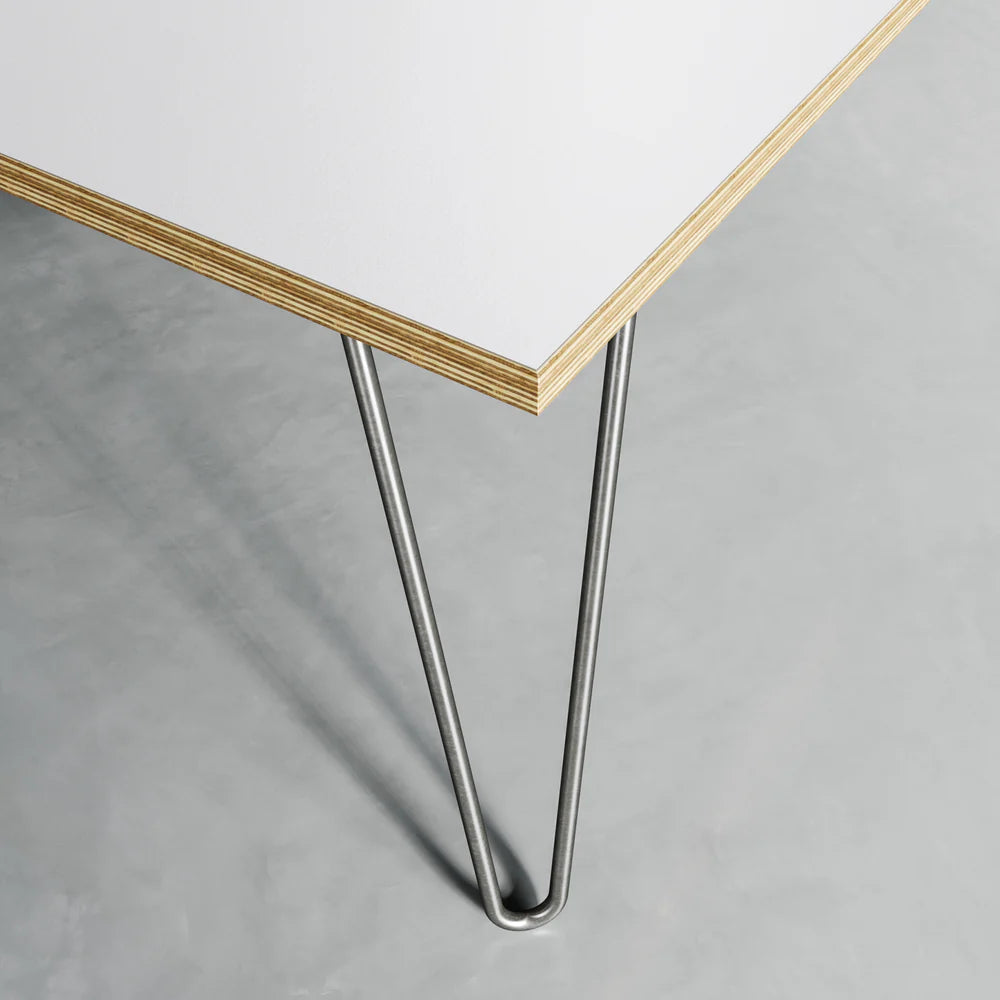
Raw, unfinished furniture legs have their own distinct charm and authenticity. The natural grain and texture of wood or the industrial look of bare metal can add character and warmth to your space. Those who appreciate a more organic or rustic aesthetic should leave legs unfinished.
There’s also the maintenance side of things to keep in mind. You don’t need to worry about chips, scratches, or fading paint. Simple cleaning and occasional polishing can keep them looking great.
Think about where you’re going to put the furniture too. If you’ll put them outside, our harsh UK climate will take its toll on the legs and fade them fast, necessitating frequent touch-ups.
For antique or high-quality pieces, maintaining the original finish can preserve their value and authenticity. Painting over these legs might diminish their historical or monetary worth.
However, if you ultimately decide to paint your furniture legs, good on you. We’ll walk you through the process below so you can feel confident hitting the ground running!
How to Paint Furniture Legs: Step-by-Step Guide to Painting Metal and Wooden Furniture Legs Alike
Whether you're refreshing old, worn-out legs or customising new ones, here’s how to paint furniture legs - with tips for metal and wooden legs specifically along with advice on keeping the legs looking their best with a protective finish. Let’s start by choosing the right paint.
Types of Paint to Use
The paint you use can make or break the appearance and longevity of your furniture legs. You can choose from a variety of styles, including but not limited to:
- Chalk Paint: Known for its matte finish and ease of use. It adheres well to various surfaces without the need for extensive prep work. This type of paint is ideal for achieving a vintage or shabby chic look on wooden furniture legs.
- Acrylic Paint: Versatile and available in a wide range of colours. It dries quickly and can be used on both wood and metal. Acrylics are great for adding vibrant, custom colours to your furniture legs.
- Spray Paint: Provides a smooth, even finish and is especially useful for metal legs. It's quick to apply and comes in various finishes, including matte, gloss, and metallic. Just take care to work in a well-ventilated area to avoid inhaling fumes.
- Oil-Based Paint: Offers a durable, glossy finish that's resistant to wear and tear. It's best for high-traffic areas or furniture pieces that will see heavy use. However, it takes longer to dry and requires solvent-based cleaners for brushes and spills.
You can find paints at your local arts and crafts store or home improvement stores. Even supercentres carry furniture-safe paint - or, you can consider ordering it online. Just be sure to invest in quality as it will show in the final product.
Preparing the Legs for Paint
Once you have your paint on hand you can get to work - but don’t open that can or reach for a brush just yet. A bit of prep work is necessary to ensure the paint adheres well.
Begin by thoroughly cleaning the legs to remove dirt, grease, and grime. Use a mild detergent and water for wooden legs, and a degreaser or acetone for metal legs. Ensure the legs are completely dry before proceeding.
Then, you can sand them down to create the proper base for a more vibrant, longer-lasting finish. Use fine-grit sandpaper (220-grit) for wooden legs and medium-grit sandpaper (120-grit) for metal legs. Wipe the legs with a damp cloth after sanding to remove any dust.
Finish up by applying a primer to create a more uniform base and, again, improve the adherence of your chosen paint. This will ensure the final colour and finish pops. It will also prevent the rusting of your metal furniture legs specifically.
Use a wood primer for wooden legs and an acid primer for metal legs (you can find this in most car shops or online). Apply the primer in thin, even coats. We suggest at least two coats.
Allow it to dry completely according to the manufacturer's instructions, or if you’re not sure, at least 24 hours. Then, you’re ready to start painting metal furniture legs.
Overview of Painting Metal Furniture Legs
Spray paint is often the easiest to use for metal legs as it provides a smooth, even finish. But, here’s how to paint metal furniture legs with a few different methods:
- Spray Paint: Shake the can well and apply the paint in thin, even coats, holding the can about 12 inches away from the surface. Allow each coat to dry before applying the next. Multiple thin coats are better than one thick coat to avoid drips and runs.
- Brush Paint: Use a high-quality brush to apply the acrylic or oil-based paint in long, smooth strokes. Avoid overloading the brush with paint to prevent drips. Work in sections, and let each coat dry completely before applying the next.
Allow the paint to dry thoroughly after the final coat. This may take several hours to a few days, depending on the type of paint and environmental conditions. Curing lets the paint harden fully for a durable finish.
Overview of Painting Wooden Furniture Legs
Now, if you’re working with wooden furniture legs, the steps will be slightly different. Mainly in the type of paint you use. We recommend chalk paint for a matte, vintage look or acrylic paint for vibrancy and durability. Oil-based paints work well for glossy finishes.
- Chalk Paint: Apply the paint with a brush, using long, even strokes. Chalk paint typically requires fewer coats and dries quickly. If you prefer a distressed look, lightly sand the edges and raised areas after the paint has dried.
- Acrylic Paint: Use a synthetic brush or foam roller to apply the paint in thin, even coats. Allow each coat to dry completely before applying the next. Two to three coats are usually sufficient for a solid, even finish.
- Oil-Based Paint: Apply the paint with a natural-bristle brush, using long, smooth strokes. Oil-based paint takes longer to dry, so ensure you have adequate drying time between coats. Typically, two coats are enough for a durable finish.
Again, the drying time between coats is essential so that each adheres properly and the end result looks beautiful. Let the paint cure for up to a week after the final coat as you would with painting metal furniture legs.
Adding a Protective Finish
After you’ve given the paint time to cure, you can consider adding a protective finish to safeguard against wear and tear. You can choose from a variety of finishes:
- Varnish: Provides a durable, glossy finish that protects against scratches and moisture. Suitable for both wooden and metal legs.
- Polyurethane: Available in water-based and oil-based formulas, polyurethane offers excellent protection and is available in matte, satin, and gloss finishes.
- Wax: Ideal for chalk-painted legs, wax provides a soft, matte finish and adds a layer of protection. It requires reapplication over time to maintain its protective qualities.
If you go with varnish or polyurethane, you can use a high-quality brush to apply it in thin, even coats. Allow each coat to dry completely before applying the next. Lightly sand between coats with fine-grit sandpaper to ensure a smooth finish. Two to three coats are typically sufficient.
Wax is a bit different in that you’ll use a soft cloth to work the material into the wood in circular motions. Buff the wax with a clean cloth to achieve a smooth, even finish. Reapply as needed to maintain protection.
Before you actually install furniture legs, make sure the finish has time to dry and cure completely. It can take a few days depending on the type of finish and environmental conditions.
Caring for Painted Furniture Legs to Keep Them Looking Stunning
While the hard work of painting furniture legs is done at this point, you’ll need to give them a bit of care every so often to keep them looking as stunning as the day you finish the job:
- Regular Cleaning: Dust your painted legs weekly with a soft, dry cloth to prevent dirt and grime build-up. Use a damp cloth with a mild detergent solution for more thorough cleaning. Avoid abrasive cleaners or scrubbing pads, which can damage the paint. Always dry the legs after cleaning to prevent moisture damage.
- Avoid Direct Sunlight: UV rays can cause the paint to fade and deteriorate over time. Position your furniture away from windows or use curtains and blinds to limit sun exposure. Consider applying a UV-resistant finish to protect the paint if moving the furniture isn’t possible.
- Touch-Up Tips: Keep a small amount of the original paint for touch-ups. If you notice minor chips or scratches, lightly sand the area with fine-grit sandpaper, clean it, and apply a matching paint. Allow it to dry and finish with a protective topcoat if needed.
- Regular Maintenance: Depending on the type of finish used, periodic reapplication of wax or polyurethane may be necessary to maintain the protective layer.
And there you have it - everything you need to know about how to paint furniture legs! If you’re still looking for wooden furniture legs or metal furniture legs to begin the project, there’s just one thing left to do - find the perfect foundation for your furniture at The Hairpin Leg Co.!
Find the Perfect Furniture Legs to Paint at The Hairpin Leg Co.!
Our company has been the UK’s trusted choice for furniture legs since 2013. We’re proud to empower DIYers and professionals alike with captivating designs, high-quality materials, and world-class craftsmanship that keeps them coming back for more.
From timeless classics like our hairpin legs to our industrial table legs, there is something for everyone in our catalogue. We have a wide variety of sizes and finishes to choose from, too. Narrow your search below:
Across all the different styles we specialise in, we prioritise hassle-free installation so you can elevate your furniture fast. You get all necessary hardware (including pads to protect your floor) and detailed builder’s guides.
Your order is also backed by a 60-day money-back guarantee and a five-year warranty so you can shop with peace of mind. We’ll even ship your legs free over £50.
So, take a look around and see what catches your eye. Because we offer our metal hairpin legs in 13 different powder-coat options, you may discover that you don’t even need to paint them after all! But if you do, you now know how to paint metal furniture legs.
You’re in complete control of your next steps, but either way, it all starts at The Hairpin Leg Co.!
Parting Thoughts on How to Paint Metal Furniture Legs
Painting furniture legs is a rewarding way to add a personal touch and refresh your furniture. We hope you feel excited and confident in how to paint furniture legs at this point.
By choosing the right paint, preparing the surface through sanding and priming, and applying a protective finish, you’ll achieve a durable and stunning result you’re proud to show off.
Find more insights in our blog, like how to fix hairpin legs, how to install sofa legs, how to make hairpin legs without welding, how to raise a bed without legs, DIY metal table legs, DIY wooden table legs, how to change dining table legs, what metal is used for table legs, and more.
From the best dining table legs to the best desk legs, the best leg design is waiting to be discovered at The Hairpin Leg Co. Transform your home with pieces designed to last and impress today!







Leave a comment
This site is protected by hCaptcha and the hCaptcha Privacy Policy and Terms of Service apply.